Thursday, May 12, 2011

Rainy Day Project: Growing Paper Garden

Okay, it's another rainy spring day in MN, so I thought I'd post this project I did with Sammy on a rainy day a couple weeks ago.  I apologize that I have no kind of template for you to download on this one, because I totally made it up as I went along with stuff we had around the house.  But, if you're up for "wingin' it" a bit, give it a try!  I did take tons of photos so hopefully that helps!

Anyway, I was feeling extra super-mom-ish this day, which is NOT typical by any means, but I was determined not to let another rain day turn into a big Thomas and Friends cartoon marathon.  In my effort to do something creative, resourceful, and somewhat educational, this is what I came up with...a somewhat mechanical "paper garden" that grows when the rain falls.  (see the tie in to rainy days? Way to focus on the positive...flowers to come!)


So, I started by giving Sammy some paper and a flower shaped paper punch to keep his hands busy...
 He had fun punching flowers out and coloring some with his crayons.

 We just kindof experimented with random ways to make flowers.  This one I glued onto a bamboo skewer.

While Sammy made flowers, I grabbed this box out of our recycle bin that held a huge assortment of Jelly Belly jelly beans I had gotten for my hubby a while back...
 I cut off half of the lid...you'll see why later.  If you can find a shallow box like this that doesn't have an actual lid, you can just cut a square hole on the top half of one side.


 Next I grabbed a full sheet label out of my studio to cover the bottom half of the lid, in case we wanted to color on it or something, and to cover the Jelly Belly box art.  Since it's all sticky-backed, I didn't have to worry about glue...
 Trim the corners as needed so it wraps around nice...
I folded the extra flaps around the back, which also fixed the lid to the bottom of the box.

 Here's the box, ready to house our paper garden!

 Sammy still working on flowers and leaves!  I gave him some paper shapers scissors and he had fun just chopping up paper.

Toby wanted in on the action, so taped a piece of paper to the table for him to color on.  He lasted a few minutes until he started eating the crayons.

 While the boys were busy coloring and cutting, I cut a slit in the top and bottom of the box with an x-acto knife. I made this size to fit some green ribbon I had in my studio...you could probably use yarn or something too but I found the surface area of ribbon worked best.

 Then I fed some ribbon through the slot...

 ...and wrapped it through and around the box like so.


Then I just used a stapler to secure the two ends together.

So, our garden needed rain to grow (hence the rainy day project).  I was going to cut out blue rain drops from paper, but decided to personalize it a little more, and have Sammy trace his hand for the rain.
 Okay, so he may not be the most "precise" when it comes to hand tracing, but it was cute anyway.

 I cut out a couple clouds...two sheets at once so I'd have two identical ones to sandwich the ribbon between.

 I glued one cloud on the underside of the ribbon, under the stapled area.

 Then I glued Sammy's "rain" hand to the cloud,

 ...and glued the identical cloud over the top.  So, you have the ribbon and the rain in between two cloud layers.

 To make it easy for the cloud to pull up and down, I stapled loops to the ribbon just above and below the rain cloud. (I probably could have incorporated this with the one original ribbon but it was an afterthought!  Remember, I'm making this up as I go...)


 Sorry about the sideways pics...don't know what's up with Blogger! Anyway, you can see the cloud can be pulled up and down while the ribbon passes through the slots.  So, next, I apologize I blanked on my photo taking at this part...but, here's what we did to make the garden part...

I pulled the cloud down as far as it would go.

Next, I cut a square piece of white paper for the "sky" and glued it to the back side of the back ribbon layer...the ribbon inside the cut-out top half of the box.

 Then, I cut a shorter rectangle of green paper and put that on top of the back ribbon.  So you're sandwiching the BACK ribbon now, just like you did with the cloud, only this time it's between a piece of sky and a piece of green grass.
 Sammy and I then glued in our leaves and flowers to this green rectangular piece, to form our garden.  Sammy drew a yellow sun in the background on the piece of "sky" paper, and asked me to draw some birds. We also stuck in some flower stickers. (another sideways pic...sorry!)

 So here's the final goal...when you pull up on the top loop, the cloud comes up and hides the sun and the garden.


 As you pull DOWN on the loop under the cloud, making the rain fall down into the ground, the garden full of flowers raises up in the background. 

I really wanted to make the cloud disappear behind another layer, so it's not like some garden floating on top of a cloud.  But hey, I was totally winging it, so I gave myself a break. Plus, his giant hand rain drops were wider than the box so it wouldn't have fit so well.  You could just put a piece of paper over that though and make another spot for the cloud to hide!

 Here Sammy is studying the many flavors of Jelly Belly's that were once in the box, illustrated on the back:


 ...and, here he is making it rain so his flowers will grow!
Cheesy...maybe...but at least it kept us all quiet and entertained...if only for a few minutes!!  ;-)

Monday, May 9, 2011

Designer Desks to Support Orphans' Education in Nepal

Check out these great desks, designed and built by 11 New York wood workers, artists and architects to support the education of orphans in Nepal.  The desks will be auctioned off on May 12th at the Kids of Kathmandu’s fund raising event! (via DesignWire)

The designers:
Mark Righter of Cambium Studio, cambiumstudio.com
Daniel Moyer of Daniel Moyer Design, danielmoyerdesign.com
Brian DeRosia, brianderosia.com
Stephanie Beamer and Lauren Maccuaig of MADE, made-nyc.com
Eric Manigian, manigian.com
Andrew Rumpler of Nine Stories Furniture Co., ninestoriesdesign.com
Andrew Raible of Standard41, standard41.com
Ben Strear of Strear Built, strear-built.com
Bill Hilgendorf of Uhuru, uhurudesign.com
Alejandro Cabrera and James Cohen of Wadaly, wadaly.com
James Harmon of Workshop, workshopdesignbuildllc.com

Saturday, May 7, 2011

Attention Procrastinating Dads! Mother's Day Gifts to Make With Your Kids...

 Dads! QUICK! Tomorrow is Mother's day and if you have little kids, you've GOT to help them make something for Mom!  Equally as great as a homemade gift is knowing that Daddy spent some time making stuff with the kids, and that you didn't FORGET! ;-)  What's that?  You mean you did almost forget?  No worries....it's not too late.  Here are the magical words any Mom would love to hear today, or any day for that matter: "Honey, let me watch the kids...why don't you go out shopping or get a cup of coffee by yourself for a couple hours." Sweet...major brownie points for Dad and time to scramble and pull together a homemade gift! See how nicely that works out for everyone?

http://www.unique-baby-gear-ideas.com/baby-footprint.html
Unique Baby Gear ideas

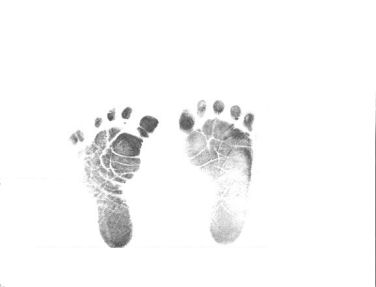
We moms love things that preserve our kids' little-ness...their little hands, their little toes...I remember the horror that gripped me when we brought Toby home from the hospital and I realized that they never made me any little footprints before we left.  With Sammy, they were sure to take a little set of prints, which they no longer put on birth certificates, but just for the new mom to put in the baby book.  What were they thinking?! Just because Toby's my 2nd in no way means I want to save his teeny footprints any less!! And how could I have forgotten!! I contemplated taking him back to the hospital just for footprints.  I literally cried over it.  Of course, I was all hormonal from just having a baby.  But, my wonderful husband ran right out to Babies-r-us and bought me a beautiful frame, complete with a footprint kit, and all was well and right with the world again!

Here are some ways you can utilize your kids' hands in a little Mother's Day card or gift.  We know that someday our kids will be big and have jobs and will order us our Mother's day gift from flowers.com.  But until then, we'd love to be showered with these cute, homemade, priceless gifts that we'll likely end up saving in shoe boxes in our closet for years to come.

This is such a cute idea to turn hand prints into lillies...one I haven't seen before anyway!

Here's another twist on the lilly.  This was posted as an Easter craft, but also would work for Mother's day.  You can get a little pin backer at the craft store and Mom can wear it!

Got some (washable) paint on hand? Try making these cute paintings with both hands AND feet!  (Warning: Do not leave a huge mess for Mom to clean up when she gets home.)

 This one is really pretty, and while it may be too intimidating for dads to do anything involving fabric, it's a sure winner for Mom!  You could also do this with paper, or even buy some flower stickers if you're not up to making these little 3D ones.  (or even get some silk flowers at the craft store)  Definitely a frame worthy idea!

I found this one on a Valentine's post, so you may want to tuck this one away until February.  But, it would work for Mother's day too.  I just liked this idea of forming a heart with two hands.


 Here's another cute idea to incorporate flowers without actually making the hand flowers.  Love it! Again, something you could do with silk flowers, flower shaped stickers, or even a flower shaped paper punch if you aren't up for cutting out flower shapes.  (Trying to make this easy for you, Dad!)

 Here are some more fun ideas to turn hand and foot prints into frame-able artwork, like this butterfly! These require a bit more artistic talent to pull off but are really cool.

Keep in mind that any of these hand print projects that involve paint could easily be done with fabric paint on something like an apron, a pillow, a tote bag, a shirt, a dish towel, whatever!

Colorbok Stepping Stone Treasure Stone HeartMidwest Products Mosaic Leaf Stepping Stone KitMidwest Products Mosaic Butterfly Stepping Stone KitMidwest Products Kids Garden Handprint Stepping Stone Kit
Last year I bought a stepping stone kit from a Michael's craft store and made a stone with each of my boys' footprints in it.  I plan to do one every year, and with the 40% off coupons I get from them, it's a great deal!  These have to dry for a while though, so if you're going to do this, start it NOW!(or save this one for next year) There are tons of styles out there and they come with everything you need.  Some even enable you to put photos in them.  I always see them with hands, but since it is a STEPPING stone, I thought it would be fun to do feet for mine.

Okay, so there you go, Dads, you have no excuses left!  Surely you already have the stuff in your house to make at least some of these ideas.  Now kick Mom out of the house and get dirty with your kiddo's! ;-)

Thursday, May 5, 2011

Top 11 things I'd like for Mother's Day (in no particular order)


1. A date with my husband [more than twice a year]

2. One full Thursday of garage sale-ing that is not limited by full bladders, full diapers, empty tummies, car seat buckles, strollers, and nap times.

3. Hugs, Kisses, and homemade cards from my sweet, sweet boys that involve hand prints, glitter, macaroni, and all that priceless, cheesy stuff that I admit I love. (photo above via)

4. 24 hours at home [by myself]

5. A visit from the magical potty training fairy

6. This super awesome overpriced refrigerator  [yeah, right! And yes, it plugs in, but no, I don't mind.]

7. Everybody to clean up after themselves for just. one. day.

8. Somebody else to take over the kids' morning "getting dressed & fed" routine and evening "getting into bed" routines for a week so I can just do the funnest parts in the middle. [spell check did not underline "funnest'...proof enough for me that it's a real word]

9. A completed honey-do list [who am I kidding...can someone complete MY to-do list?]

10. An opportunity to go to the bathroom without an audience. [I'm flattered, but would prefer not to scar you for life, boys!]

11. A chance for my alarm clock to be the one to wake me up. [can I set it for noon?]

Wednesday, May 4, 2011

Eat, Shop & Play Without Throwing Your Money Away!

This morning I had the privilege of presenting to my church's moms' group with my wonderful, creative, and resourceful friend Jessica VanMarter!  Jess has inspired me in so many ways.  Her encouragement and recommendations were what gave me the final "push" I needed to try out cloth diapers.  (See Part 1, Part2Part 3 & Part 4 of my extensive exploration of all types of cloth diapers if you're interested!)  Every time I talk to Jess I learn something awesome, which is why I'm so glad she recently started her blog

We had a a great time sharing our experiences and our tips and tricks for saving money in three areas of our lives as moms...eating, shopping, and playing!   Jess shared many great ideas for saving money in the "eat" section, and really opened my eyes to the enormous savings you can enjoy purchasing bulk spices, among many other ideas!  I shared my own tips and tricks for saving money buying other non-food items in the "shop" section, as well as some fun ways to have cheap and free fun with your kids. We really enjoyed sharing our tips and tricks, and learning even more great ideas from our audience! 

As promised, we have the slide show available for those of you who missed our talk, and those of you who would like to check out the links inside.  In general, the underlined text throughout the presentation are all web links.  (for those of you who attended...I took out the Price is Right theme music and animations to help shrink down this file size!)  We had to cut things short at the end so there are a few random tips and tricks still to see!  For those of you who didn't make it, check out the slide show for a great rundown of what you missed!  We purposely made this slide show in a way that someone who did not attend could still get all of the info they missed.

We also put together a "chicken challenge" and notes page which we handed out hard copies of.  You can download a full color pdf here!  The idea behind the chicken challenge was to challenge you to make one whole chicken, and then see how many meals you can stretch it!  Don't be intimidated if you've never made a whole chicken...the first recipe is really as easy as it gets!  We then show you how to make chicken stock from the carcass, and give two recipes to help use up the left-over meat.  Give it a try and see how far one chicken can really go!

Keep an eye out here and on Jess's blog for more tips, tricks, recipes and links related to our talk today! We hope to put together a "beef challenge" and "pork challenge" soon as well!!  Happy cooking, shopping, and playing everyone!

LinkWithin

Related Posts with Thumbnails